Quickstart
This section is a quick introduction to immediately start using Phosphor as a developer.
It will guide you through minimal setup and and a few quickstart scenarios to learn using the API.
Each of these quickstart scenarios is available for immediate use via a Postman collection that can be used with your organization.
Phosphor for developers
The APIs give you access to all features you need, such as creating a collection and minting items.
The dashboard allows you to monitor all your activity using the API. You can also manage your organization settings.
- To start using this Quickstart, you need your own Phosphor API key.
Generate your first API key
If you already have a Phosphor API key, you can skip this step.
To start using Phosphor API, you need to generate your own Phosphor API key.
See API keys for additional details
QuickStart 1: Airdrop 1 NFT to a series of wallet or email addresses
In this scenario, you will create a collection with a single NFT (using ERC-1155) to then airdrop it to multiple recipients. Target recipients will be designated either using an ethereum wallet address, or an email address.
For a recipient with a wallet address, NFT will be directly minted to this address, while for a recipient with an email address, an email will be sent with a personal claim link to later redeem the NFT.
Steps to follow:
- Create the collection and deploy the smart contract
- Add 1 item (NFT) to the collection and lock it for minting
- a. Airdrop to a wallet address (using a mint request)
- b. Airdrop to an email address (using an email claim)
Get our Quickstart Postman collection to run this example with your own organization.
QuickStart 2: Create a Free NFT Claim (100% Free for target audience)
In this scenario, you will create a collection with a single NFT (using ERC-1155) that will be proposed to your community as a 100% free NFT claim. Minting fees are automatically managed from your balance. No fee requested to the person who mints.
Steps to follow:
- Create the collection and deploy the smart contract
- Add 1 item (NFT) to the collection and lock it for minting. A maximum supply can be defined to protect your funds.
- Create a listing to enable the free claim
- (During the free claim) Generate a purchase intent for a customer to claim the NFT for free (from your claim page/application)
Get our Quickstart Postman collection to run this example with your own organization.
QuickStart 3: Snapshot a NFT contract
In this scenario, you will generate a snapshot of a NFT contract to get the list of active NFT holders.
Steps to follow:
- Request a snapshot generation with custom options (targeting TheMerge: Regenesis NFT contract)
- Check snapshot generation status (generation can take a few minutes depending on selected options)
- Get the list of NFTs holders once snapshot generation is completed
Get our Quickstart Postman collection to run this example with your own organization.
QuickStart 4 (Advanced): Sell multiple NFTs
In this scenario, you will create a collection with multiple NFTs (using ERC-721) to then sell them using a public primary market sale (primary listing).
Steps to follow:
- Create the collection and deploy the smart contract
- Add items (NFTs) to the collection and lock them for minting
- Create a listing to put NFTs for sale
- (During the sale) Generate a purchase intent for a customer (from your purchase web application)
Get our Quickstart Postman collection to run this example with your own organization.
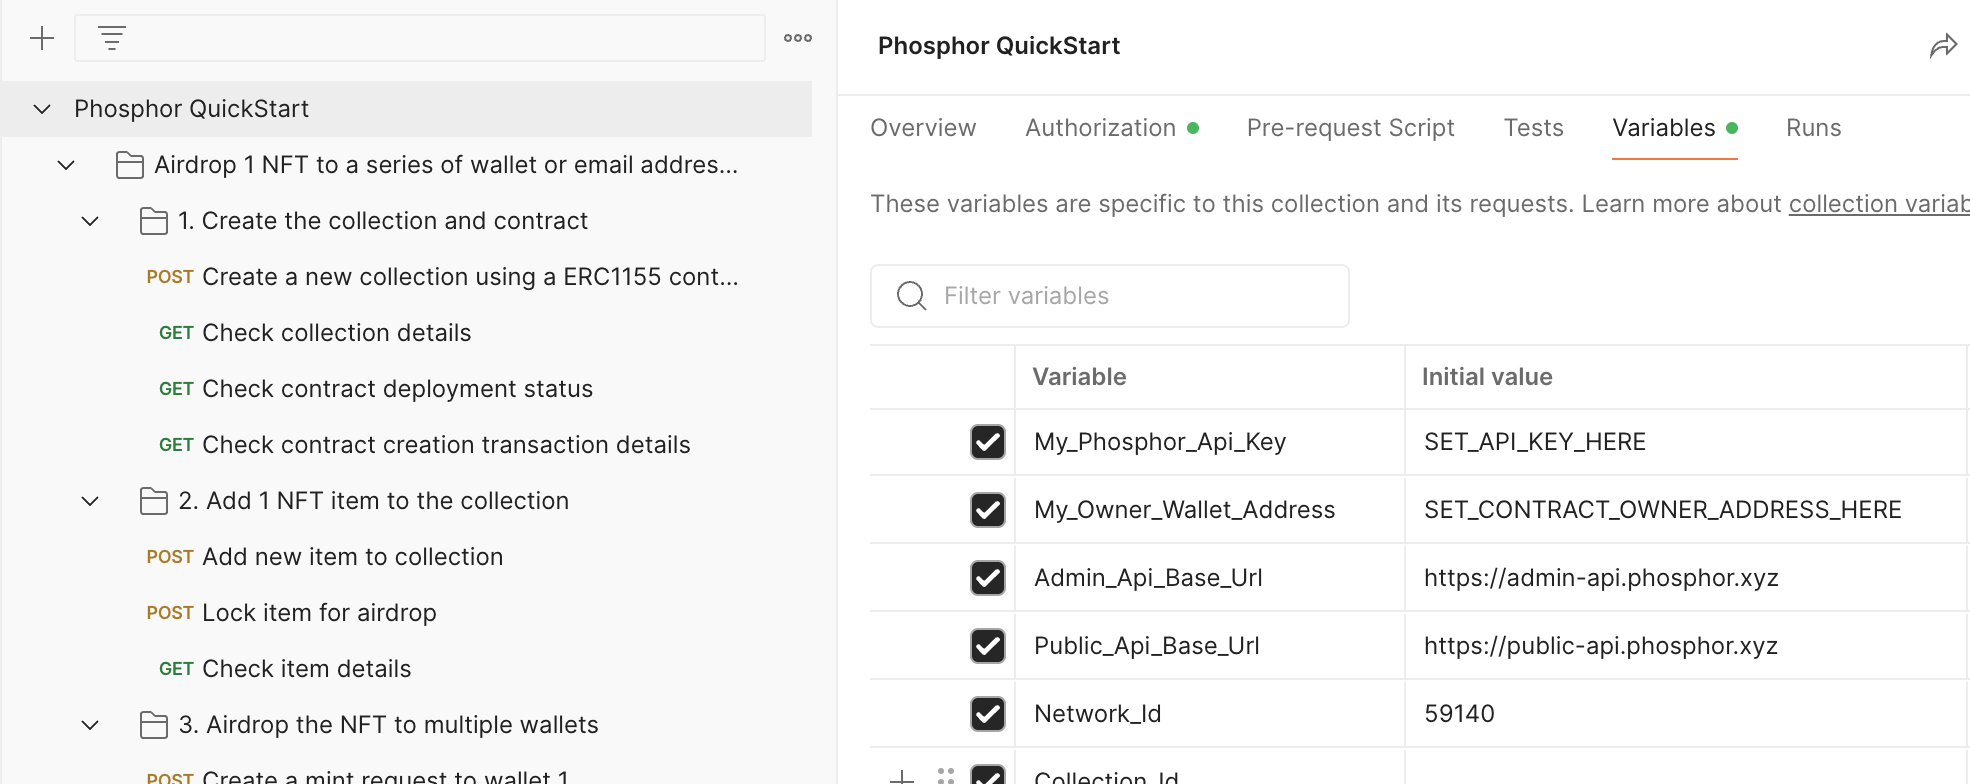
Postman collection for API Quickstart
You can use our Quickstart Postman collection to run any of the above starter scenarios.
Download and import
- Download our Quickstart Postman collection: JSON | ZIP
- Then, simply import the JSON collection file in Postman
New to Postman ? Learn more about this powerful API companion for developers.
Make it ready to run with your organization
Update collection with your personal data :
- Navigate to Variables tab at the collection level
- Replace the placeholders by your own values for
My_Phosphor_Api_Key(your generated api key)My_Owner_Wallet_Address(your personal or company ethereum address, that will own the NFT contract)
- (optional) Change
Network_Idif you want to target a specific network (default used here is Linea testnet)